
by W.A. SteerĀĀPhD
Ā
Canon Powershot G9 - long-term review
I've been very impressed with my Canon G9 which I've owned for over two years now (and taken over 7000 exposures). This review
is not meant to be comprehensive, rather to illustrate how I use a camera, and various tips and tricks
some specific to the G9 and others not.

Introduction
The G9 was widely hailed as the SLR-users' compact camera. This chunky and solidly-engineered top-of-the-range compact
offers a level of manual control approaching that of an SLR, but in a take-everywhere format.
Compared to a d-SLR, the G9 has a smaller sensor which inevitably means greater noise (not that that's an issue at ISO80/100),
and greater depth-of-field. The integrated compact lens system can't be focussed mechanically by hand, instead you're relying
on autofocus or a thumbwheel-operated focus-by-wire control - the thumbwheel method isn't really much use in practice and even
with the automatic enlarged-preview it's very hard to judge the focus on-screen. The LCD display is impressive, although operating
in full outdoor sunlight does still entail a bit of guesswork. The camera has a hot-shoe for a standard flash or remote
flash-controller - but I've not used this.
That's enough of 'managing expectations'. The good bits include intuitive and well thought-out controls, RAW format (primarily
useful for tweaking white-balence, contrast and exposure after the event), an LCD display which gives a very good representation
of what the image is going to look like exposure-wise, optical image stabilisation, optional on-screen histogram, on-screen
'analog' lightmeter (when in manual mode), an integral neutral-density filter (useful for sunsets/skies, and for giving
shallower depth-of-field in sunlight)... oh - and a respectable video-mode (30fps 640x480 or 15fps 1024x768).
I enjoy being in full control of my camera, and always expected to use it in manual mode. This review does not consider the
automatic/programme modes because I've barely used them. (If you want an automatic, there are probably smaller and cheaper cameras
which will do the job.)
For more general in-depth reviews and full specifications, see dpreview.com,
photographyblog etc.
Sure, the camera cost as much as a low-end dSLR - but unlike an SLR this camera can go everywhere with you, so you don't miss
opportunities. It really was the best money I ever spent.
First impressions and setting-up
Solid, robust (although I'd treat the extending lens carefully), intuitive controls, bright screen, interesting anti-reflective
(and scratch-resistant?) coating on the screen - gives rainbows if it catches the light!
Exposure
In common with just about all digital compacts I've used in the past, I felt that the camera erred towards over-exposure
(either in auto mode, or the exposure-guidance if using manual). That said, I do have a preference for marginally
underexposed images and I absolutely hate burned-out areas. As a general rule, I expose photos at -1/3 compared to the built-in
metering, although obviously more abnormal lighting may call for greater adjustments and some degree of experimentation and
bracketing. Correct exposure is essential in achieving stunning images; RAW comes into its own in fine-tuning exposures after
the event (more on this later).
White-balence
The built-in auto-white-balence is usually pretty good, but again if you're shooting RAW you don't need to obsess about
it as you can set it retrospectively in post-processing. Tweaking the white balence from the RAW really is the way to
obtain the colours you saw in your mind's eye.
Sharpening and noise-reduction
A common theme of all consumer-grade digital cameras, both still and video, is that they apply electronic/digital sharpening to excess.
Digital sharpening applies a mathematical filter to the image to enhance edges. While there can be some merit in using this sharpening
tastefully on images that are soft (for whatever reason) to start with, over sharpening causes 'ringing' on edges in the image
(bright halos around dark twigs in front of the sky for example) and looks unnatural and ghastly. The processing will
also tend to increase the visibility of any noise in the image, as well as making life harder for subsequent JPEG coding
(resulting on larger files and/or more coding artifacts). Whether this over-sharpening is done to compensate for poor optics
or focussing, or because Joe-public always thinks and un-naturally sharpened image is best, I don't know.
Regardless, I'm a purist, and I demand my images look natural. Images which are not over-sharpened appear far more professional.
The default level of digital-sharpening on the G9 is much less than lower-end cameras, but I still found it objectionable -
I admit I'm very sensitive to it. Custom Colour comes to the rescue. With this option on the G9 you can set turn down
the sharpening as well as apply tweaks to the colour and contrast.
From Custom Colour, I set the Sharpening to minimum (-2).
Videos shot with the G9 as-supplied suffer from more obvious over-sharpening, and my original Custom Colour didn't seem to
change that. I've since discovered that Custom Colour needs to be set separately for the different shooting modes - you
apply another set of Custom Colour settings to video, and fix that too. Excellent. A huge improvement.
Digital noise-reduction is another 'feature' which is typically overcooked on consumer-grade cameras, and used to cover
up the deficiencies of small noisy sensors or to allow working in very low light levels. Excessive noise-reduction
removes low-contrast detail and textures making them look unnatural, and in particular can tend to make faces look like
waxworks. In general, noise-reduction may also be used to cover up the noise amplified by excessive sharpening - the results can
be cartoonish in the extreme! Fortunately the default level of noise-reduction in the Canon G9 is quite modest (certainly at
the slow-ISOs that I normally use), but my personal preferance is to set the noise reduction to minimum, again using
Custom Colour. I tend to shoot low-ISOs (80, 100, occasionally 200) where conditions permit, but where faster ISOs are unavoidable, I prefer to have a
modest amount of 'natural' noise than the un-natural artifacts of over-done non-linear noise-reduction. Noise reduction is
something else which can be applied in RAW, so if noise is an issue in any given photo, you can experiment with the degree
of processing you want to apply, trading off the evils.
Image contrast
I also felt that the image contrast was a little bit harsh in full sunlight. Consequently I've set the Contrast to (-1) in
Custom Colour as my working default. I find this works very well for me, but of course if an image taken under overcast
conditions comes out a bit flat, RAW comes to the rescue - you can adjust the contrast after the event in the RAW
processing.
File-format options: RAW + JPEG
The native image-size is 4000×3000 pixels, although you can save smaller JPEG images if you really want. A unique
feature of this camera is the option to save in RAW format (at full resolution). There's an option (on a deeper menu) to save
JPEG + RAW: this saves a full-resolution high (but not superfine) JPEG image alongside the RAW. At first I was rather
disappointed that you can't have the best JPEG with the RAW, but I came you realise there's no need. Firstly, despite me
being a very critical viewer, I was very hard-pressed to find fault with the second-highest JPEG quality, and secondly, if
you're shooting RAW then any image you particularly treasure you will process from RAW anyway.
I've settled on shooting RAW + JPEG. The JPEGs act as 'proofs', and are suitable for quick browsing and/or copying to any
friends who want a quick copy. The presence of the RAW enables a really promising image to be tweaked to perfection.
RAW images (Canon CR2 format) are typically about 14MB (range 10-16MB, I presume they use some form of lossless compression),
and the accompanying JPEGs typically about 3.5MB depending on image-content (as low as 2MB if lots of sky, >4MB if 'busy').
When estimating the size of memory card you need, reckon on about 18MB per shot when shooting RAW+JPEG.
Optical image stabilisation (OIS)
I was impressed by the stabilisation and it certainly allows you to hand-hold and long zooms and/or longer exposures (eg 1/20th second).
I was confused however that when I experimented with night-shots 10-15 second exposures on a tripod I was seeing 'camera shake' - which
bizarrely disappeared when OIS was disabled. I was concerned that my camera was malfunctioning, and emails to Canon support
offered workarounds (turn off OIS) rather than reassurance. I've since learned that this is a common problem (and not a
malfunction) with all major OIS systems, always turn off OIS if using a tripod.
Picture-composition Display options
There are options to show or hide histogram, rule-of-thirds guides and other information on the display during composition.
There's also optional 3:2 soft-masking to help you compose for 3:2 aspect ratio prints if you prefer. By pressing the Display
button during image-composition you can alternate between two sets of presets, enabling for example one 'comprehensive'
display and one 'uncluttered' setting. This is useful because the histogram in particular can get in the way. As well as
the obvious application, the rule-of-third lines also prove very useful for getting horizons straight!
One minor niggle or wish would be an option for the thirds-lines to be set slightly closer to the centre than true thirds
to take into account cropping of the image in printing.
Histogram
The live histogram has some uses when composing the picture, but is not quite the definitive guide to exposure. I have seen another reviewer complain that it gives
misleading readings in strongly coloured light, but there's more to it than that. In some lighting conditions, the histogram
and probably the image 'saturates' at less than the full right-hand edge of the histogram display. Weird. More experimentation
required!
With two years of experience of using the camera in manual mode, I find my judgement on the overall image on the screen is good
enough to obtain the exposure I need.
Display
The display is large and bright. It doesn't hinge out as in some of the earlier and later models of the G-series. An undocumented
(or just perhaps obscurely documented) feature is that if you press-and-hold the "display" button in either picture-taking or image-review
modes it toggles the screen to some extra brightness, which might help slightly in bright sunlight - though no-doubt runs the battery down
quicker.
Some reviewers have criticised that the screen can have a slightly bluey tinge. I might have suspected something like this on a few occasions,
invariably indoors - and I suspect this is a psychovisual effect rather than a fault: if the camera reproduces images in sRGB,
normalised to a D65 whitepoint, then this will inevitably appear bluey if your visual frame of reference is an indoor environment
illuminated by tungsten lights at 2700K. The strength of perception of the effect will probably depend on what else is in your
field of view, and is probably strongest against a white table underneath some bright halogen spotlights! I've never
considered any tendency towards a bluey-tinge to be a significant shortcoming.
Shutter lag
I don't have any figures for this, but shutter lag will have you pulling your hair out if you're trying to photograph
toddlers who won't stay still, or sports. If you turn off auto-focus (eg for sports focus manually on infinity) then this
makes a huge improvement.
Delay timer
As well as obvious application for self-inclusive portraits, the 2-second version of the delay timer is useful on a tripod
to eliminate camera-shake.
Flash
In manual mode, the built-in flash has three power settings. The two higher power settings are suitable for general flash photography (choose
according to distance of subject and/or desired ratio of flash to ambient light). The lowest power setting is much lower,
and is suitable for close-up photography at a range from 10-15cm to 60cm of so. At a distance closer than 10-15cm, the
snout of the lens system casts a huge shadow in the beam of the flash - although for extreme close-up I have improvised with
other reflectors and diffusers with some success.
More recently, it appears probable that in the semi-automatic exposure modes the flash power can be set with much finer granularity.
It would sometimes be useful if the flash power could be set more precisely in manual, as otherwise you can only get the correct
flash exposure at about 1 metre by going to ISO200... (I know you could use the higher power flash setting and stop down, but
that tends to overpower the ambient light and give very hard shadows).
Lens Sharpness
At some zoom and aperture combinations, this camera produces stunningly razor-sharp images (and that's without digital
sharpness-enhancement) - at other combinations it's highly satisfactory, but not worthy of remark. I suspect the sweet-spot
is somewhere mid-zoom, but I've not analysed it in detail. Of course shutter speeds and camera-shake also have a bearing on
the overall image quality, and there can also be strong subjective effects depending on the the nature of the image.
Note that it is well known in the trade that higher-contrast images are perceived to be sharper.
Purple fringing and chromatic aberrations
Purple-fringing is notable by its absence. I've never had a photo from this camera spoiled by purple-fringing,
and I've seen a lot of PF in other (older) cameras including the Canon S70. On difficult high-contrast scenes (twigs against
sky, or dark fenceposts against white snow) the lens does reveal some frustrating conventional orange-edge/blue-edge colour
aberrations at some zoom/aperture settings (but I haven't analysed which). Probably utilites exist which would correct for
this in software, but it's not a problem frequently enough for me to have taken it futher.
Stuck/hot pixels
Unfortunately a couple of stuck/hot pixels seem to have developed in the CCD since I've had it, resulting in a couple of
bright red or bright blue pixels visible in dark areas of pictures taken with longer exposures. They're a bit annoying, but
not the end of the world. From comments on the web, I'm by no means alone in finding stuck-pixels with my G9. Some comments elsewhere
suggest that taking some longer (or a range of) exposures may cause the camera to recalibrate its dark-field and loose the hot pixels
-at least temporarily- but I've not spent any time experimenting with this.
Bonus undocumented feature
You get rather less manual control in video-mode, and at first it would appear that you're stuck with the automatic exposure.
However, I discovered an un-documented feature - if you press the 'star' button in video-mode, you can apply a good range of
exposure-compensation using the wheel control. Again in video mode, the 'print' button activates 'AFL' - something to do
with focussing - but I'm not yet sure what.
Raw processing
I was keen to find out what RAW processing would let me do. I was disappointed to find out that it doesn't normally offer
much headroom to recover burned out hightlights - although you can of course brighten (within reason) pictures where you've
erred towards underexposure.
What RAW does let you do is set the white-balence to get just the right amount of warmth. To tweak the contrast to make the
image punchy but not over the top. To set the sharpening settings - and I found that the RAW processing tool allows access
to contrast, colour-saturation, and sharpening settings more extreme (both higher and lower) than the options available on
the camera within Custom Colour.
RAW processing is also useful for analysing the effects of different camera-settings on a single shot, rather than having
to go and take loads of comparative pictures and remember what you did.
Note: there is a bug in the RAW procesing software which causes shot with lower-than default sharpening to appear excessively
blurred in the preview. This blurring disappears as soon as you change any image-setting from the camera-setting.
Raw processing is slow. It takes about 65 seconds to save and process a RAW image on a 1.8GHz single-core
processor, and it uses 100% processor resources which makes it difficult to do anything much else at the same time. A dual or
quad-core processor would probably help with multitasking, and may speed up the processing. One has to wonder though, if the
software could have been written more efficiently - after all, the camera itself does the processing in under a second!
Finally, RAW allows you to build your own custom tone (gamma and more) curve. As in any other photo-processing software
this allows you to adjust the contrast - but of course from the full 12-bit quality RAW original. More wacky curves with
two or more control-points allows you to change the relative constrast of lighter and darker parts of the scene, for example
to brighten the overall image while compressing (rather than crushing) highlights, or to stretch the contrast (and saturation)
in the sky without adversely affecting the foreground.
Battery life
I don't know what the official battery life is, but if you're doing sightseeing for 3-4 days then take your charger and/or a spare
battery with you. Similarly, if you spent a day at a wedding starting with a fully-charged battery, you could expect to have
the low-battery indicator blinking by the end of the evening reception!
On the other hand, if you're carrying the camera around with you everyday and just taking a handful of photos a couple of times
each week, then you'll probably go a month between charges.
Examples
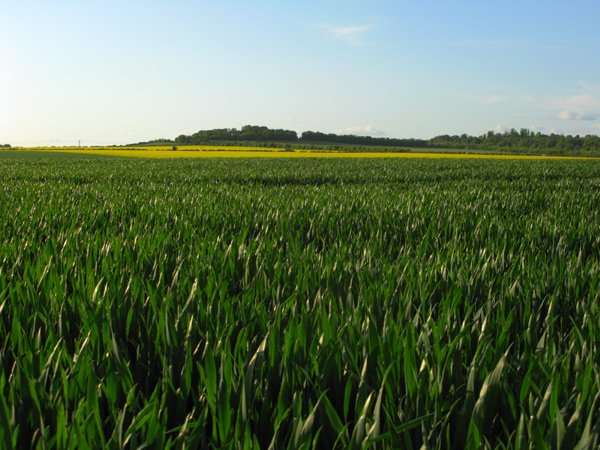
Manual mode: ISO80, 1/500sec, F4.5, 12.7mm zoom, custom colour
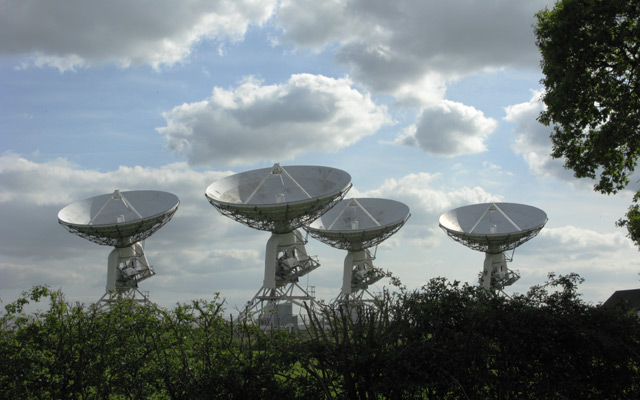
Manual mode: ISO80, 1/200sec, F4.5, 12.7mm zoom, custom colour
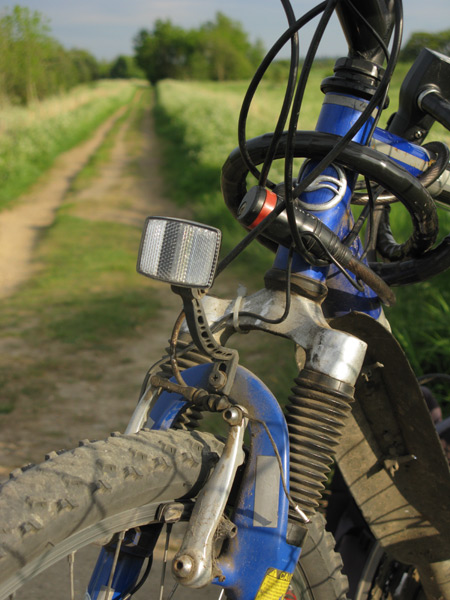
Manual mode: ISO80, 1/80sec, F3.5, 16.8mm zoom, custom colour

Manual mode: ISO100, 1/160sec, F4.0, 22.0mm zoom, custom colour
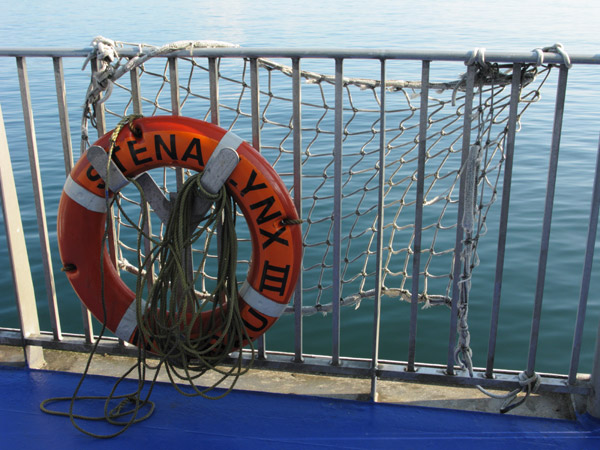
Manual mode: ISO80, 1/250sec, F5.0, 9.9mm zoom, custom colour
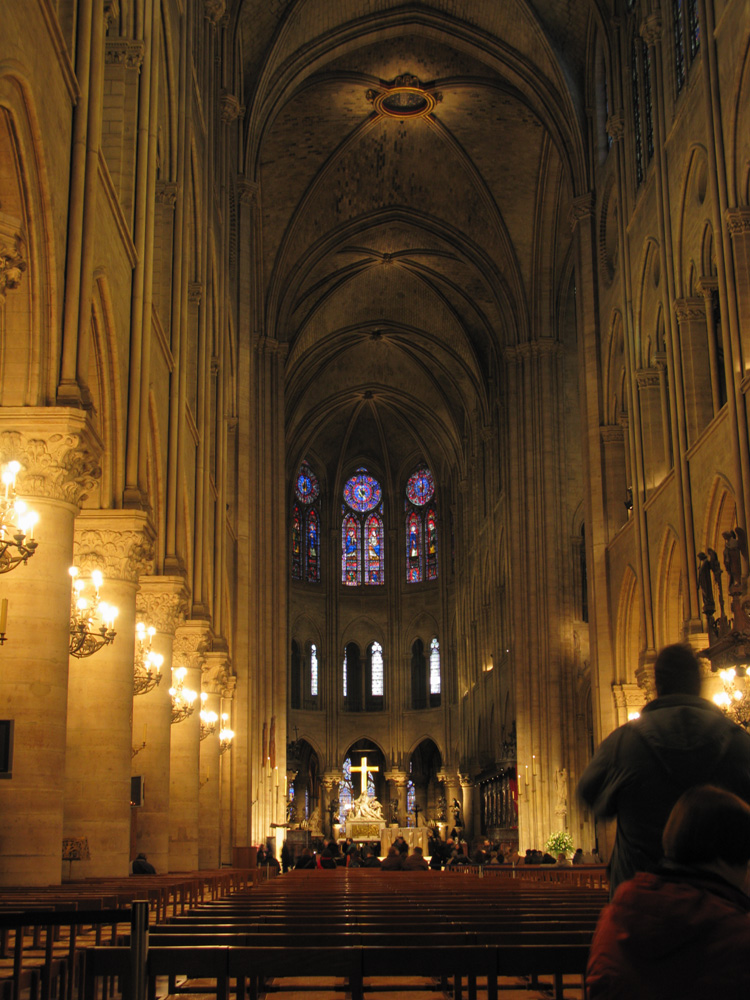
Manual mode: ISO100, 0.4sec, F3.2, 10.7mm zoom, custom colour
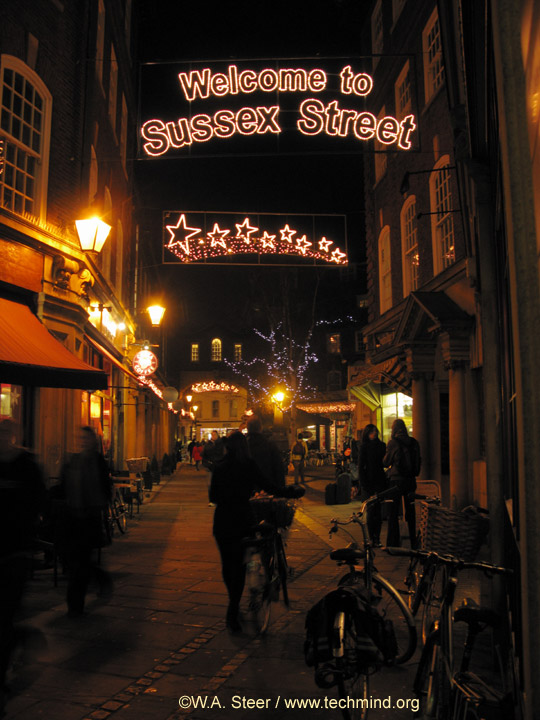
Manual mode: ISO100, 1/6sec, F2.8, 7.4mm zoom, custom colour
(I should add some more photos to illustrate close-up and close-up flash photos eg for technical illustrations.)
Must-have accessory
The Pedco UltraPod II Lightweight Camera Tripod is small and light enough to go-anywhere.
I find it invaluable longer available-light exposures (use the 2-second delay timer), and for for self/group portraits.

Created: May 2009
Last modified: 2 Oct 2010
Source: http://www.techmind.org/g9/index.html
©2009-10 William Andrew Steer
andrew@techmind.org